Naturally Dyed Easter Eggs

20-65 MIN

Total Time

5 MIN

Prep Time

15-60 MIN

Cook Time

INGREDIENTS
Use ingredients in your kitchen to decorate your eggs — like turmeric for a golden yellow or beets for a dark pink!
DIRECTIONS
To make naturally dyed eggs, TOSS your choice of a handful – or two or three – of one of the ingredients listed into a saucepan. Use your own judgment about quantity. This is an art – not a science!
ADD about a cup of water for each handful of your chosen ingredient, so the water comes at least an inch above your dye materials. BRING mixture to boiling, reduce the heat and SIMMER from 15 minutes up to an hour, until the color is the shade you want. Keep in mind that the eggs will dye a lighter shade. REMOVE the pan from the heat.
Through cheesecloth or a fine sieve, STRAIN the dye mixture into a small bowl that’s deep enough to completely cover the eggs you want to dye. ADD 2 to 3 teaspoons of white vinegar for each cup of dye liquid.
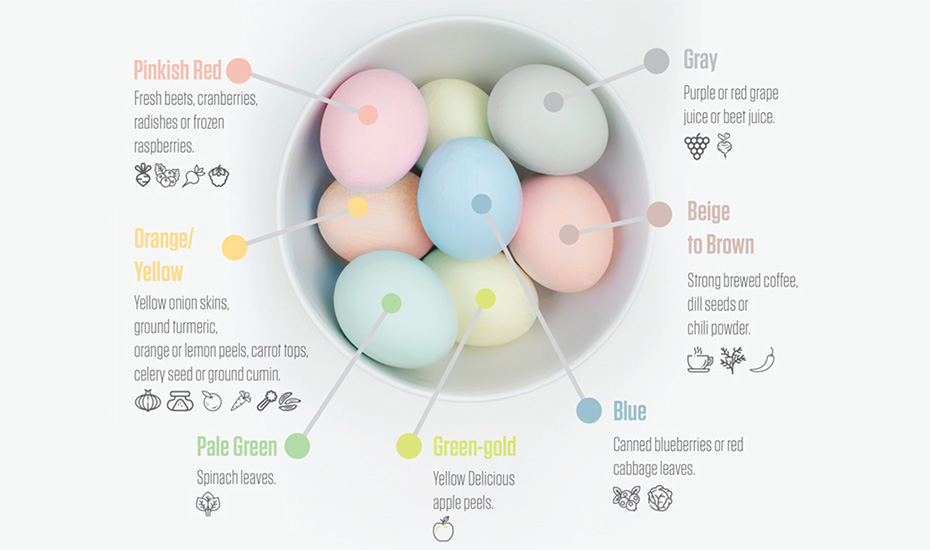
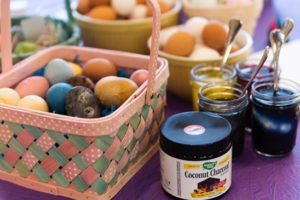
With a spoon or wire egg holder, LOWER the eggs into the hot liquid. Let the eggs stand until they reach the desired color. For emptied eggshells, stir or rotate for even coloring. With a slotted spoon or wire egg holder, REMOVE the eggs to a rack or drainer. Allow the eggs to dry thoroughly. Refrigerate hard-boiled eggs that you intend to eat within two hours, and always follow tips for egg safety. Naturally dyed eggs require longer soak time in the dye solution for the color to take hold (overnight will give the best, most saturated color).
For more easter eggs decorating ideas like this one, visit The American Egg Board.